The tile leveling system is used when you need a guaranteed result for perfect tile relief, regardless of the preparation of the surfaces and the thickness of the adhesive substance. The system is quickly gaining popularity among the experts and those who are trying to lay tiles for the first time. Follow these simple steps to install floor tile leveling system by yourself!
What is Lippage and How to Avoid it?
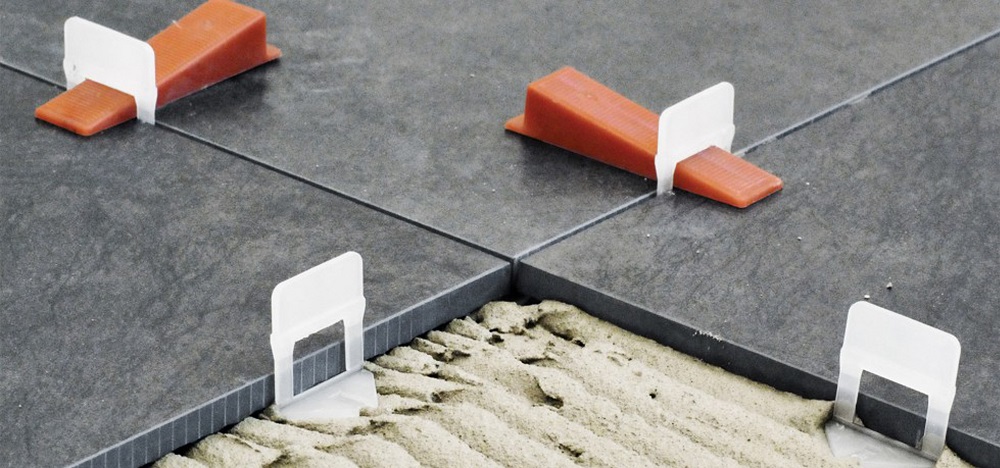
A lippage is a vertical displacement between two nearby tiles, basically, tiles are installed at different levels. Not perfectly level floor or low-quality material can spoil the whole working process if you’re not careful. The difference in height between the edges of the nearby tiles is not just aesthetically unpleasant, but it might also turn into a tripping hazard. The LASH tile leveling system (an acronym for Level, Align, Space, Hold) is a unique two-piece spacer system for different types of tile designed for quick installation. Due to uneven edges, it helps conquer lippage, virtually eliminating it, and speed up installations.
How to Install Floor Tile Leveling System: 6 Steps
Installing tiles seems like a simple process, but if you are a professional, you know that this is more than it seems at first glance. You will need much more than spatulas and spacers to level the tile properly. Before the start, it’s important to note down the main tools you will need:
- shop vacuum
- building paper
- adhesive
- self leveling tile spacers
- trowel
- mallet
Now, when you have everything you need, here are tips on how to install floor tile leveling system:
- Make sure the floor is level. Installing tiles at different levels, you risk creating lippage.
- Remove dust and debris from the subfloor with a shop vacuum.
- Place a layer of building paper on the base, cutting out pieces that go from wall to wall and apply 3 inches to the previous piece.
- Spread the adhesive all over the surface with a trowel.
- Place the tile levelers at the point where the slabs meet.
- Place the spacers at an average distance of 12-16 inches.
- Put the slab down on one side and lay it, making sure it adheres properly and repeat the procedure for each slab.
- Place the self-leveling spacers in place, without forcing them in.
- Tap the surface with a mallet to avoid the formation of empty spaces and air bubbles.
Remember that the self-leveling tile spacers make the surface perfectly flat only if to use the right way carefully following all the instructions.